Process
- Scanning. At the start of the restoration process a scan is performed to capture the detail, subtle shades and colour that remain in the photograph. The digital file created by this scan (rather than the original print, negative, slide or photographic glass plate) is then carefully restored. Scanners (like cameras) vary in quality, so I prefer to scan the original photograph with my own equipment to be sure of creating the best reproduction. But if you would like to email your photograph to me, please scan prints at a minimum of 600dpi (dots per inch) - or better still, at 1200dpi - making no adjustments to the scanner's default settings for scanning photos. At this resolution, an enlargement of your picture should be possible.
- Restoring.
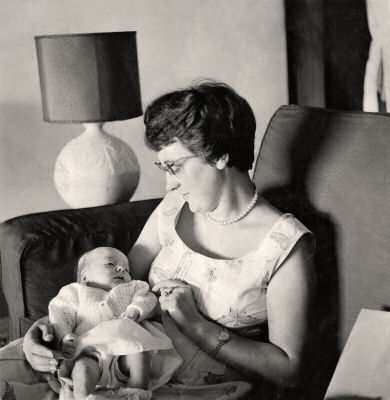
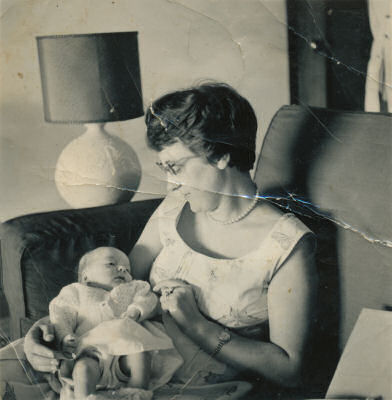
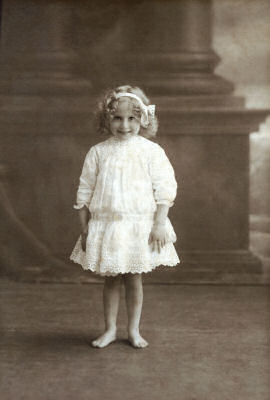
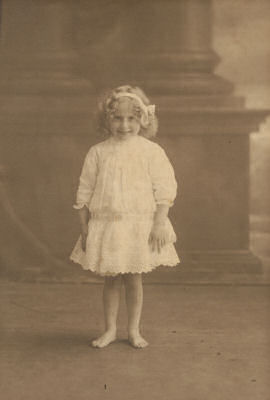
Restoring Glory step by step…- Repairing. Each photograph requires its own combination of repairs. Typically, a damaged photograph will be suffering from some of the following: creases, tears, marks, stains, missing sections, writing, speckling, fine scratches, surface decay and dust marks. With careful and patient work it's possible to restore most prints, negatives, slides and photographic glass plates to their original glory.
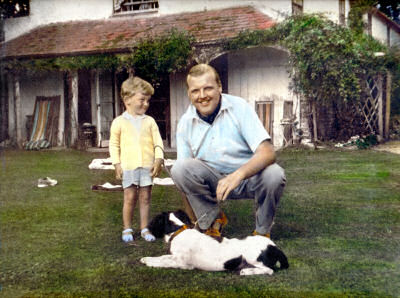
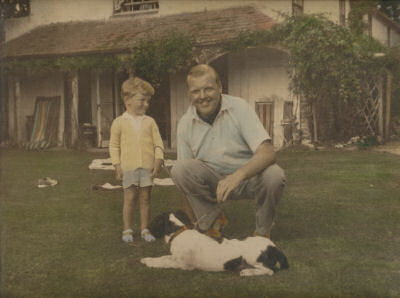
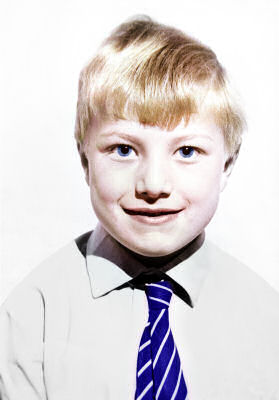
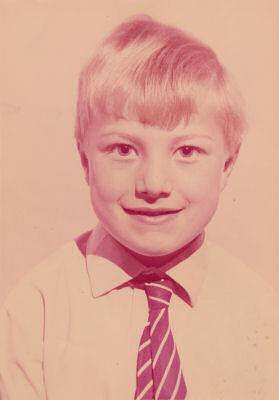
- Colour-correcting. Colour photographs, especially those exposed to sunlight's UV rays, can soon discolour and fade, in extreme cases resolving to a single blue, green, red or yellow. Altering the balance of colours where they exist (colour-correcting), and painting colours in where they have disappeared (colourising), are the two main techniques employed when repairing such a picture. Colourising, however, normally takes place as a separate process, once the restoration itself is complete (see below).
- Enhancing. Over time a photograph may fade. Working sensitively, I can enhance the picture so that it looks again as we imagine the photographer intended.
- Retouching. It is rarely necessary or desirable to retouch (airbrush) an old photograph so that original detail is changed. But sometimes a small alteration will improve a picture.
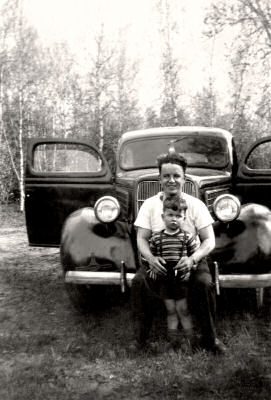
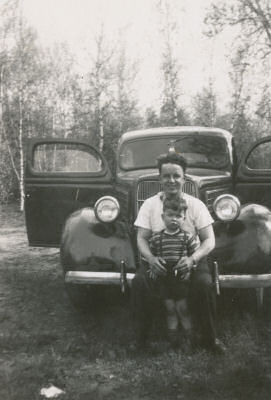

- Repairing. Each photograph requires its own combination of repairs. Typically, a damaged photograph will be suffering from some of the following: creases, tears, marks, stains, missing sections, writing, speckling, fine scratches, surface decay and dust marks. With careful and patient work it's possible to restore most prints, negatives, slides and photographic glass plates to their original glory.
- Colourising. Where colours have disappeared altogether, or never existed, it is possible to 'paint' them in. This can make an old photo come alive. Of course, the more that can be remembered of how the picture looked originally, the better - the colour of the dress, or the flowers; of the hair and eyes.
- Printing. The restored photograph exists first of all as a digital file. From this file, prints and enlargements are created as they are needed. Where required, photographs can be cropped to remove parts of the picture that aren't wanted, sized to fit a special frame, supplied with or without a white border, and enlarged (depending on the quality of the original image).
- The digital file. I supply the digital file of the restored photograph so that new prints and enlargements can be created at home whenever they're needed, or a copy emailed to relatives and friends or uploaded to social media.